♥ Stalk Me ♥
MY SWEET SKULL
  • WELCOME
  • COLLECTIONS
    • SUGAR COATED
    • KITTY LOVE
    • DAY OF THE DEAD
    • FIRST YEAR >
      • CLAY CREATIONS
  • RAZZ ACE
    • LINKS
    • TUTORIALS
  • BLABLA BLOG
    • BLOGGER
  • SHIPPING
    • ONE LUV ♥
  • HOLLA!
  • EXTERNAL LINKS

Carving a Cameo

5/20/2013

0 Comments

 
Well, I have been slacking! I haven't posted in a while, but it feels like just yesterday!
I have been working on my favorite, cameos. Doing a lot of new stuff, but I haven't been finishing them! The colors aren't right, I'm not liking the beads, or my sculpting isn't making me happy. Do any of you other crafters get that sometime?
I don't like to craft just to make a buck. I like to put my heart and thought into it, every time. It takes time to create and come up with new ideas.

I went to Vegas a few weeks ago. Didn't know when to stop gambling and lost a few hundred dollars. Yikes! But I love Vegas and came back inspired. By the way, I am addicted to Roulette! I always play number 8.

I moved my work station around, too. Not really a good thing. I condensed things down and I like to work with everything on top if my desk. But It was pretty bad. My key board was on a mountain of beads and I wasn't being very productive.

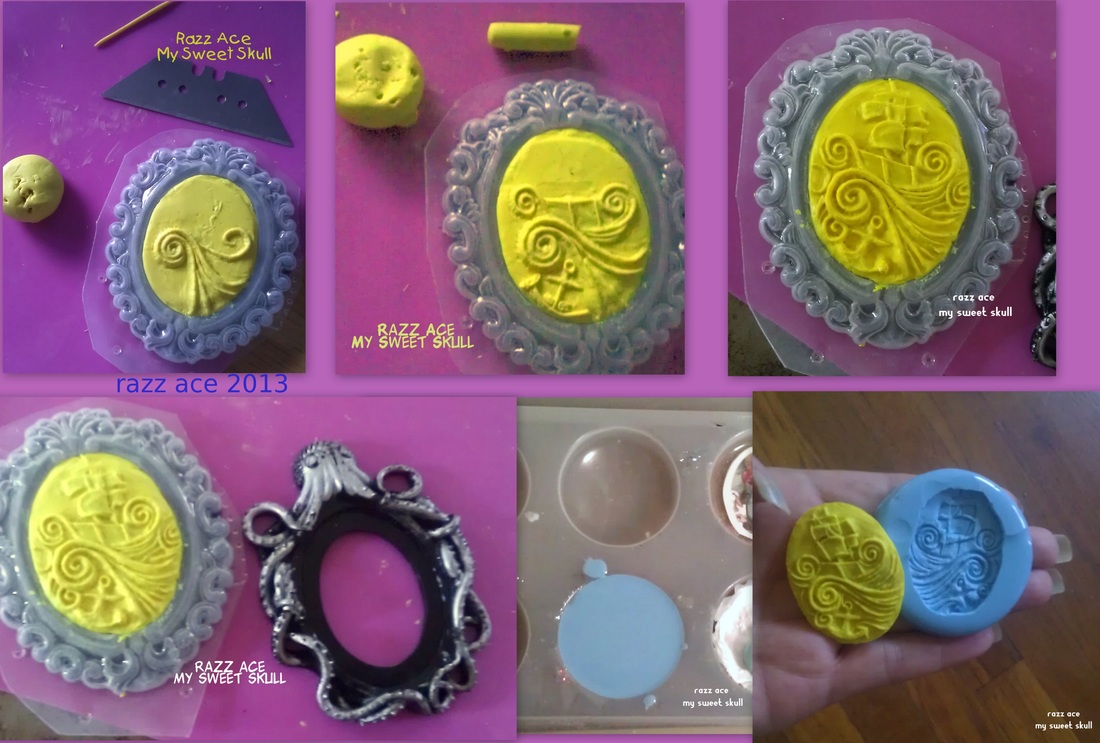
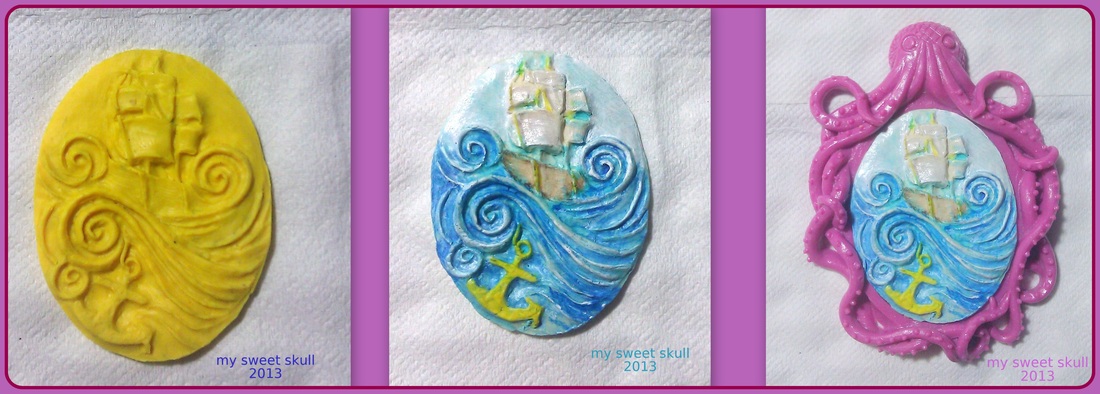
I purchased an octopus cameo setting and I had a very pretty cameo to add to it. But I realized that it wasn't going to be unique if I glued two designs from other artists together, right? I had to design my own cabochon to put into this setting if I wanted to keep on my toes.

Anyway, I noticed my clay had dried up quite a bit. My friend Espi of Fairy Tales and Rebel Yells gave me some fresh clay to play with. I got this itch to start carving and sculpting small designs. I had a plastic mold setting, (in pic below), that I used as a guide to keep my cabochon at a 40x30 mm size. So I started doing a water theme first. After I was happy enough with my work, I froze it for a few hours to make it easy to pop out of the plastic mold frame to bake in the oven. I wanted to create a hard copy of my carving so I made a silicone mold of the oven baked cab.
Picture
My mold is sturdy and reusable so I start making clay replicas and below I show one that I painted. I add it in my octopus cameo setting that I purchased a while back.  I love it! I will need to sand down the edges and do some other changes, but I do like my design. :0)
Would you like a cabochon to play with? What color would you make it? Hmm, I should do a giveaway!
Picture
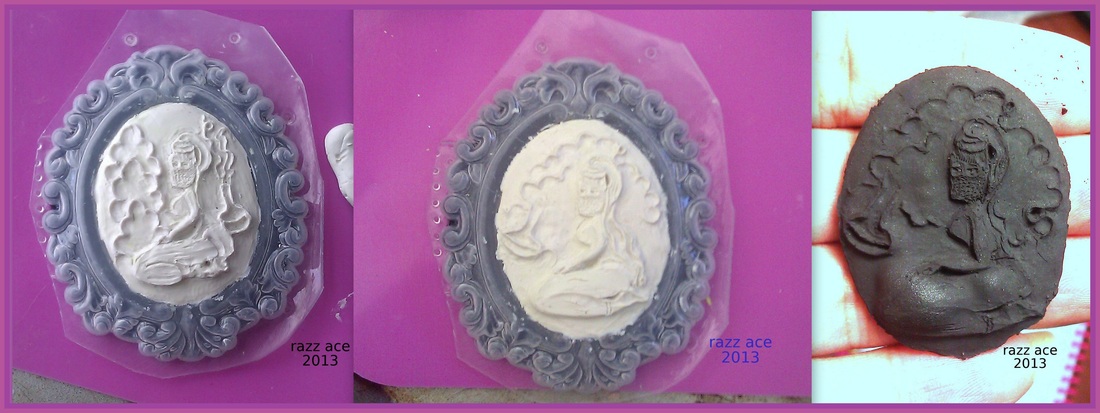
I was still on a rampage to crave and sculpt. So I decided to do the beautiful genie from the TV show, 'I Dream of Jeannie.'
The middle one I was happy with, (pic below), so in the oven she goes. Except, my honey made hash browns in the oven during the time I was carving, and didn't realize the temperature of the oven was at 450 degrees! I'm so silly, I just assumed it was still at 250 and didn't even check. The house started to get smokey and I quickly checked my cameo and it was burnt to a crisp! Her leg even bubbled up! Yikes! But I'm crafty as heck, I will fix it. ;) I'll have her available soon as well.
Picture
Anyway. I'll have a giveaway for some sea cabochons for you crafty girls to play with. If anyone would like to purchase one, check here.
Thank you for dropping by!
xoxo
Razz
0 Comments

Making Earrings

9/20/2012

0 Comments

 
I like to share on Instagram, but I thought I would share here just for others who don't use the app on the smart phone.
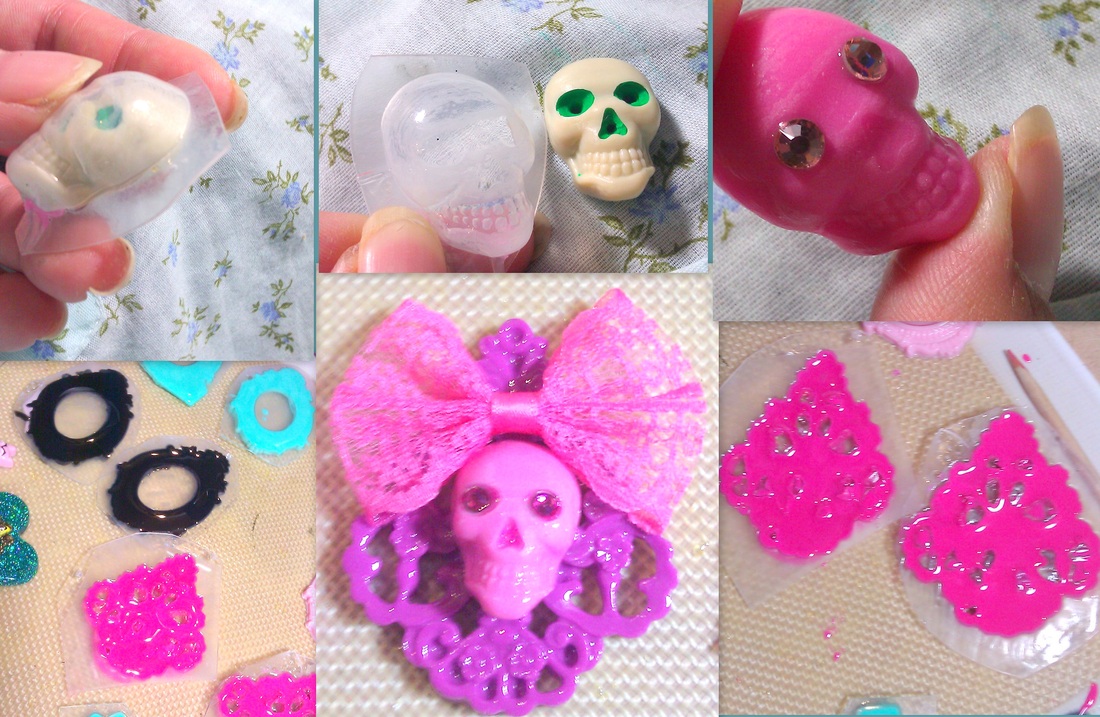
I wanted to share how I created a skull flat back bead cabochon from a skull head. I purchased a skeleton at the Dollar Store. I took his head and sliced it down the middle with a razor blade. Usually I slice my finger, but luckily not this time! :0)
I then stuffed the hollowed skull head with clay, so that when I create a mold, I won't have air inside and make an odd shape. Instead of using silicone to create a mold, I used my vacuum former. I created a plastic see-through mold, perfect to make a smooth skull head!
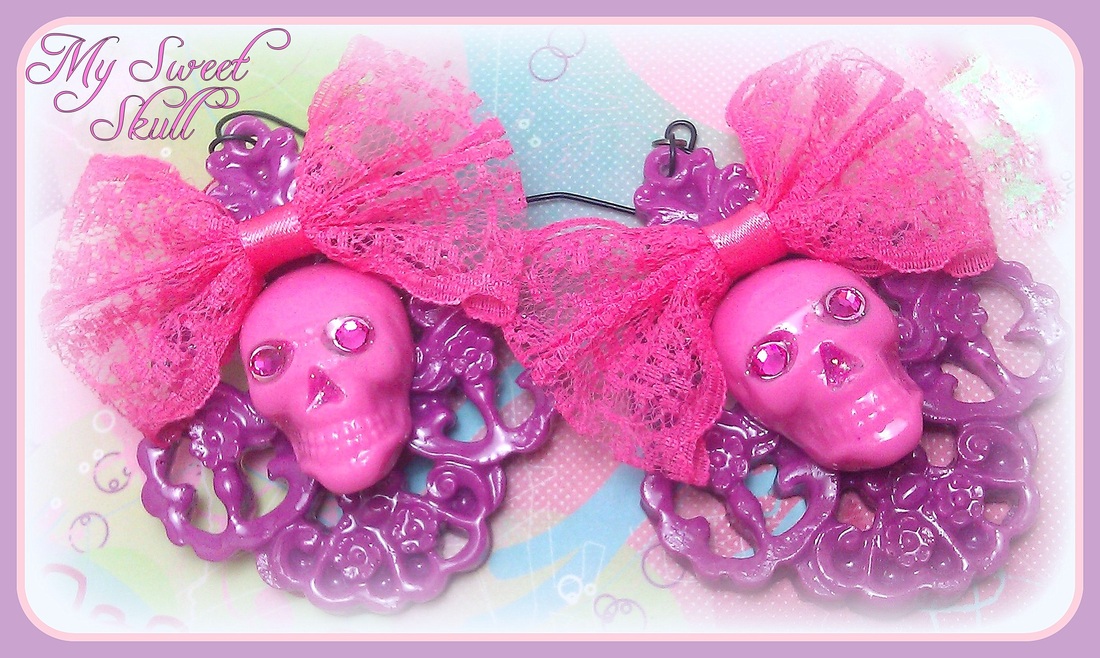
The next day I popped out my skull head and added crystals over the eyes. I hate making bows, and dealing with ribbon. Nut Had to use some for her head onto these earrings! I really do love how they came out. I'm making a bunch now - and some are even for me to keep! :0)
Picture
Picture
0 Comments

DIY Ring Holder

3/1/2012

3 Comments

 
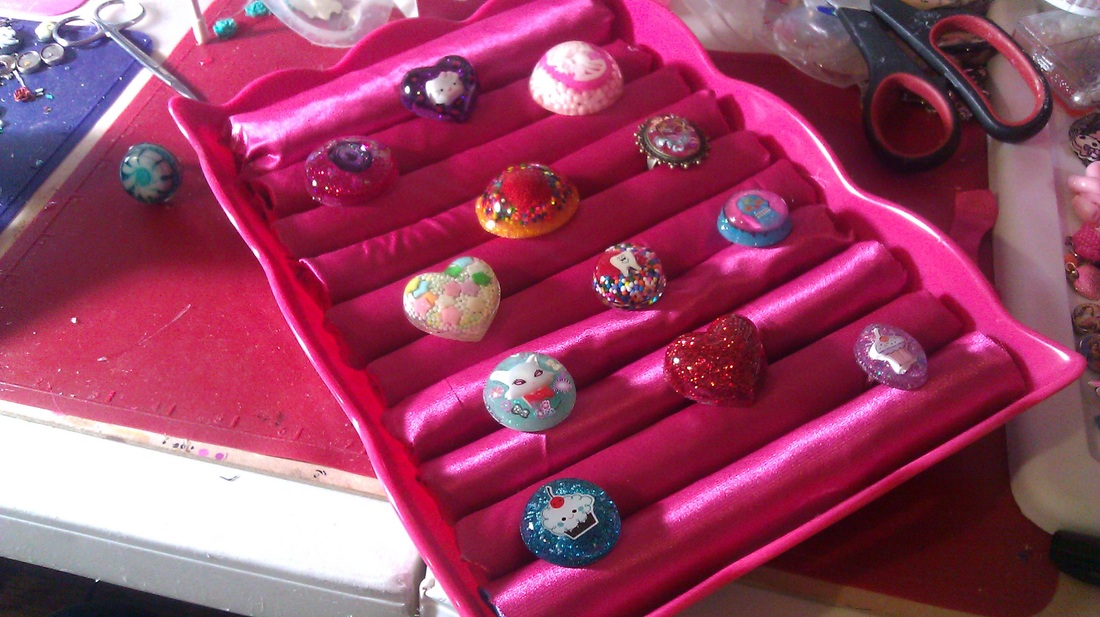
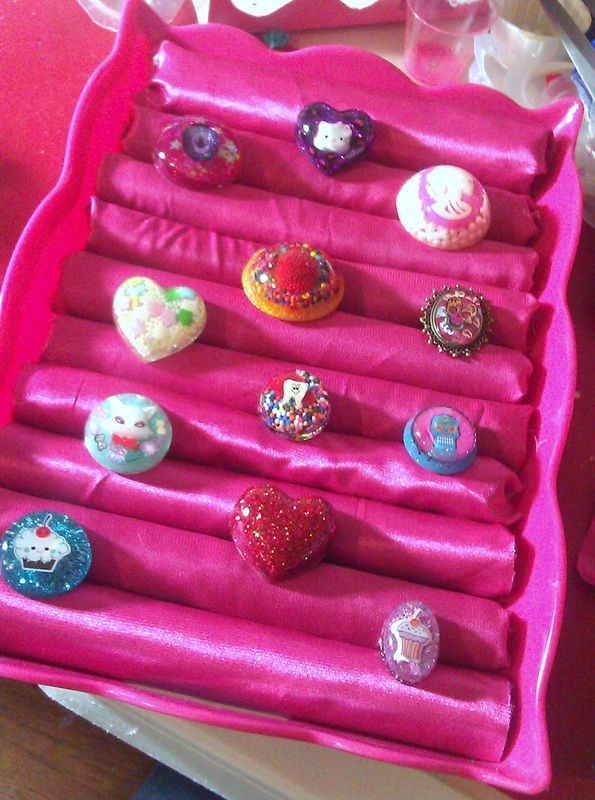
 I had signed up for the Fresno Craft Bazaar which was last week. I knew I had to get on the ball and start creating my display. I had a bunch of new rings made and needed to show them off some way. Well, I seen the simple ones being sold at Michael's craft store. But I really wanted to have something more brighter, more colorful. I decided to create one with the things I had at home. If you would like to create one as well, it costs less than $7 from items at your dollar store. I had about a yard of fabric at home, but you can get some from the remnant section for about $2 at Wal-Mart or JoAnns, too.
 Items I used were:
a tray found in the dishes section,
colorful foam sheets,
glue gun with a pack of glue sticks,
fabric to cover each foam sheet,
scissors.
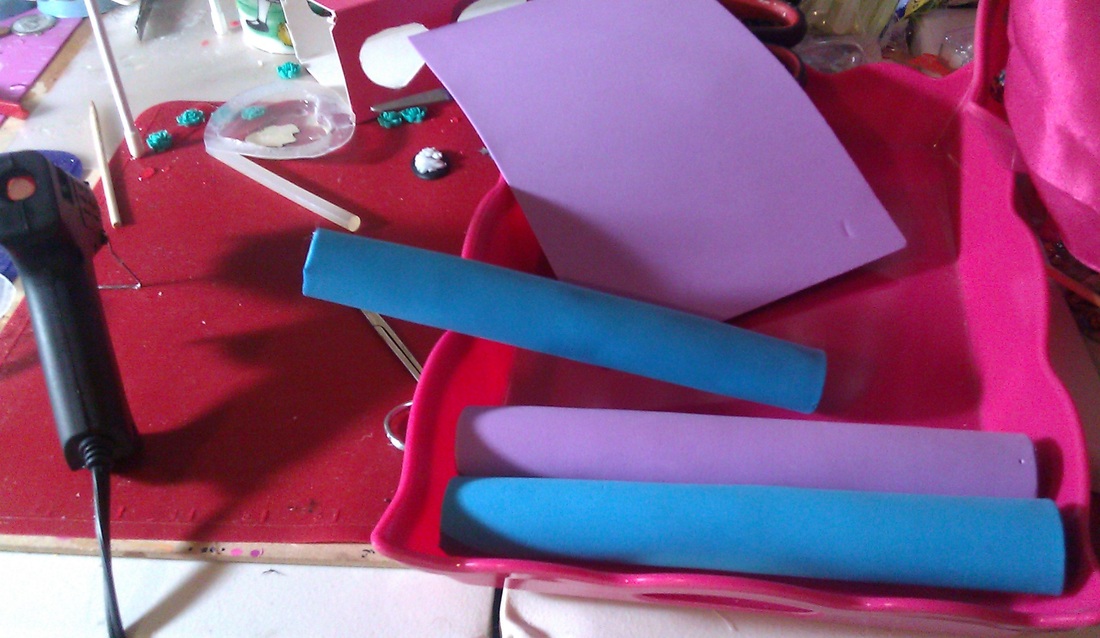
I started off rolling each foam sheet and gluing them shut.
Picture
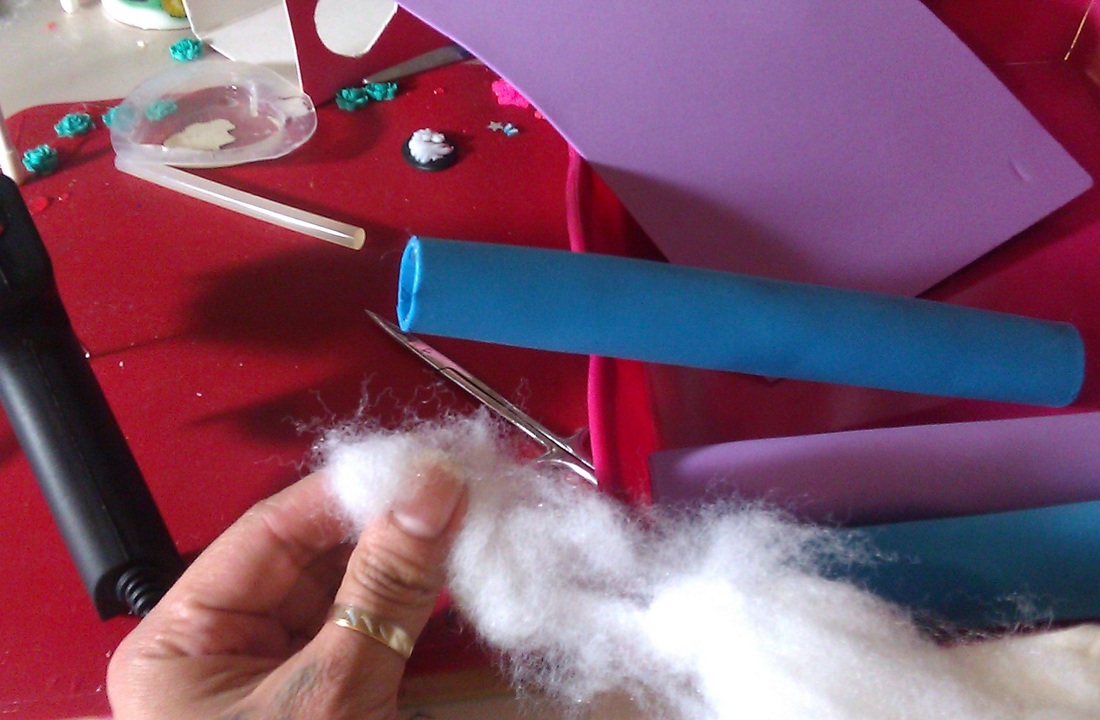
I had found some fluffy pillow stuffing from one of my many unfinished projects, and decided to stuff them to be harder. This is optional, but I wanted to make them more firm.

Picture
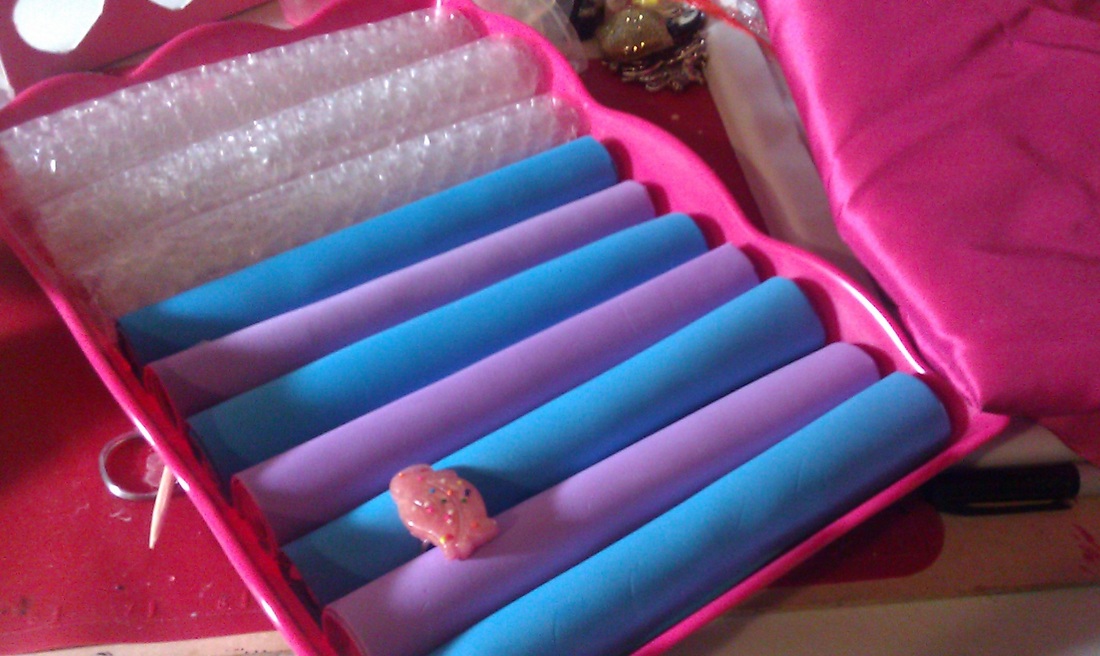
I should have bought another pack of foam sheets at the dollar store. But when i started this project, it was well after 2 am, and I didn't want to wait to finish my ring holder! That being said, I searched my studio and found bubble wrap. I then rolled them up firm and hot glued them closed. But don't glue them into the tray yet! Let's cover them with some leftover fabric I had laying around my fabric case. I collect fabric, although my sewing machine has been in storage for over a year. Ha!
Picture
I then piled each foam in the tray to see if it would be too squishy, or check if the gap is too big. The ring fits perfect and now I'm ready to glue on my fabric. After I glue on my fabric, I glue the rolls right down into the tray.
Picture
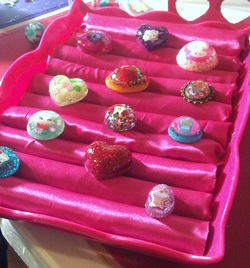
I am happy with the turn out! I am happy to have created a bright colored ring display. By the way, I got compliments on my display the whole day at the craft show. I wish I had more pics of my display holding my jewelry, but I was so busy, I didn't get a chance! I also Left my phone at home and didn't get any good pics. I will get some next time. :0)
Picture
Picture
3 Comments

DIY Ring Holder

1/20/2012

0 Comments

 
This is a really cute idea for a rind display case. Mine was inspired by this project a year ago. Easy and pretty!
0 Comments

     Razz ace

    Picture

    Jewelry Designer

    I create til my head crashes onto my pillow! Bird and cat lover, dreamer and loves books. I live in Central Valley, California.

    Archives

    December 2013
    June 2013
    May 2013
    January 2013
    December 2012
    September 2012
    April 2012
    March 2012
    February 2012
    January 2012

    Categories

    All
    2012
    2013
    Bee
    Bug
    Cant Sleep
    Concert
    Contest
    Craft
    Crafts
    Display
    Diy
    Funeral
    Giveaway
    Gramma
    Grave
    Hints
    Insect
    In The Making Of
    Music
    Ocean
    Octopus
    Process
    Rambles
    Resin
    Ring
    Rings
    Sea
    Skull
    Tutorial
    Vendor
    Wasp
    Winner

    RSS Feed

Powered by Create your own unique website with customizable templates.